Pages

Showing posts with label crewel. Show all posts

Wednesday, March 25, 2020

Crewel Lily of the Valley: I think it's finished :)

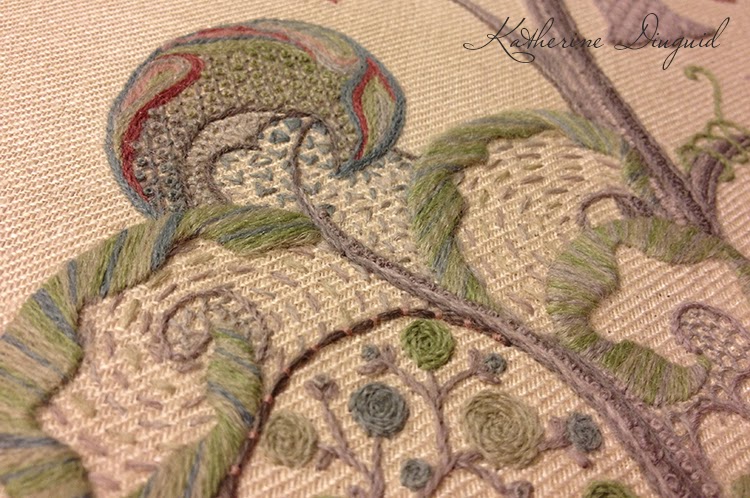
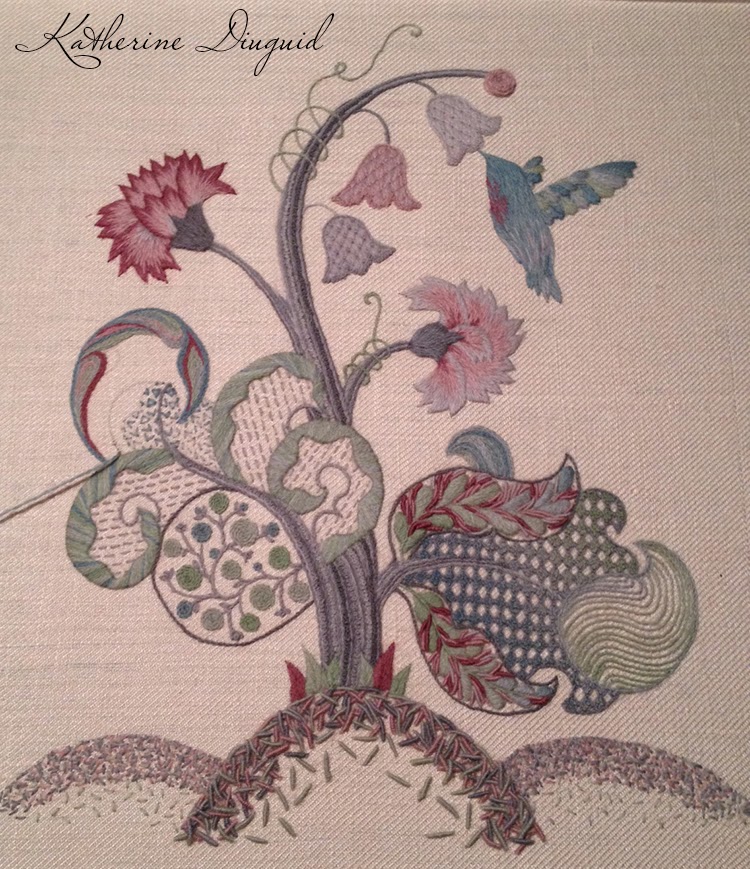
After smoothing out a couple of the leaf outlines and making the top fillings in the leaves slightly darker, I think it's finally finished.  I've stitched this piece with Appletons Wool on Linen with a bit of DMC Diamant.  Below are a few photographs of the finished piece.  Now, to the sketchbook to plot the next piece!


Tuesday, March 17, 2020

Back to Blogging and Back to an Old Project!

After I finished my RSN Crewelwork piece, I was dying to start a new piece of crewel, so I had started this piece back in 2014.  I wanted to combine the traditional crewel feel and techniques with a motif that was a bit more modern and designed this Lily-of-the-Valley design.  I had almost finished the filling in the leaves when I needed to take it off the slate frame to start another piece.  It sat in my studio cabinet and I'd get it out periodically to consider finishing.  However, there was always another piece that was moved ahead of it.  So there it sat until a few weeks ago.  I had been working on finishing my City and Guilds Level 3 Certificate when I just needed something to stitch- no big decisions, something that was ready to go and just pure pleasure.  And, from the depths of my cabinet this piece emerged!  I framed it back up, got my ziploc baggie of threads back out and started stitching on it again.

 Since I thought the filling on the leaves were complete, I started back with the stem stitch on the stem.  I have to admit that the methodical packed stem stitch is a technique I find incredibly satisfying.  It looks so lovely on the surface and it really enjoyable to stitch. 

I chose to use darker greens because if you study the leaves of lily of the valley, you will see that the leaves are mainly fairly dark green with faint lines of lighter/more yellow green.  I wanted that darkness reflected in this piece. 

After I finishing the stems, I felt that the fillings on the leaves needed a bit of darkening.  The darkness of the darkest green in the stem seemed to dull the subtle shading of the lighter greens in the fillings.  I decided to go ahead and add in some darker greens while following the subtle gradient already defined in the lighter colors. 


Part of the reason that this piece had sat in my cabinet for so long is that I had started stitching two of the blossoms and I was not convinced about the techniques I had chosen.  They felt flat and just "not right",  so I ripped it all out and started anew.  I also decided to add in a bit of gold so the white would stand off the cream of the linen more.  I thought the gold would help to break up the white in a way that may help to highlight some of the subtle blanc to cream shading I was exploring.  And, let's be honest, I like to gild the lily when I can.


For the gold, I am using one of my current favorite metallic thread--DMC Diamant.  Tracy Franklin introduced me to it when I took her Silk and Gold class in Williamsburg a few years ago and I love this thread!  In all the metallic threads that I have used I think this one shreds the least.  It is also a similar (though not exactly the same) line weight as the Appletons Wool I was using for the rest of the piece when it is stitched.  It is also very helpful that it is pretty easy to get my hands on now too as a number of online stores stock it as well as Hobby Lobby. 


There are a couple minor tweaks I'd like to make before I reveal the full final piece.  I will post it shortly.  In the meantime, I hope everyone is staying safe and healthy!

Sunday, March 16, 2014

A New Crewel Piece

So after I finished my RSN Crewel piece, I wanted to practice crewel some more.  I also thought that if I put a new piece on my frame it would mean that I would not be able to redo anymore of my RSN piece (I'm only halfway serious!).  Basically, I wanted to do a new piece that I could have a bit of fun experimenting with while practicing.

I designed a Lily of the Valley layout and picked my colors.  I wanted to stick to greens and whites.  I thought that since most Jacobean crewel flowers are done in more fanciful colors it could be interesting to do this piece in more realistic colors but maintaining the fanciful patterns and flourish-style of Jacobean crewel.  Here's where I'm at after a few days of stitching:


Tuesday, March 11, 2014

RSN Crewel: I Really Think I'm Finished!

I really think I'm finished this time.  I have redone the outline of the large portion of the bottom of the left leaf.  I have redone a few rows of the running stitch in the top middle portion of the left leaf.  And, I have taken out the running stitch of the small last portion of the left leaf and replaced it with a lattice pattern and redone the outline stitch of that portion. 

I still think the running stitch may be too big, but I'm nervous to take it out again as there are a couple places from taking it out last time that have not seemed to recover.  It is so interesting to me as I followed the same length as when it was straight lines, but the stitches just seem so much bigger on the curved lines.  

All in all, I think I am happy with it.  I think I'm happy to move on- is this bad to say?  I have learned a lot from this piece and I'd like to try another piece of crewel.


Sunday, February 2, 2014

Crewel Redo #1 (Because yes, there could be a redo #2)

I would first like to thank everyone who took the time to give me some feedback on my crewelwork after my last blog post about it, as I was struggling with figuring out why it just wasn't working.  I think the best thing about grad school was the amazing people I was around and the constant critique of my work.  Now, as the teacher, I am giving feedback to everyone else's work, but rarely getting feedback on my own.  I have to search critique out now instead of having critiques built into my schedule.  So, a huge thank you to all of you!  I greatly appreciated it! 

After stepping away from my piece, I emailed Tracy because I could not figure out what parts I should redo for my RSN assessment.  She knows that I am a perfectionist.  Through the RSN Certificate, I want to challenge myself in learning the technically correct technique with the different types of embroidery, but I also want to challenge myself in how I apply the stitches within the design compositions.  I feel that the application is vitally important as it really can change how the stitch is read or how successful the composition is.  I want my piece to be the best possible for assessment! 

After chatting with Tracy, we decided that I'd redo the straight lines of running stitching that filled the 3 middle parts and the outline of the bottom bit of the left leaf.  We thought the straight lines seemed too static and did not match the movement of the rest of the piece and the outline of the bottom bit was too thin and a bit wonky.  I thought maybe keeping the running stitch technique, but I'd do them in parallel curved lines for the filling.  For the outline, I thought I'd try couching because I had not done any couching on this piece.  

Here is where I'm at:  I tried to do the running stitch in the same scale as I had done with the straight lines.  However, I think with the curved lines they need to be smaller.  So this is where the possible next redo comes in.  Does the larger scale seem rough?-- is what I keep asking myself.  

For the couching, I LOVE couching with goldwork, but I did not anticipate how fluffy it would be between the holding stitches with the wool thread.  Lesson for the day:  even if you know a technique with 1 material, it should be sampled first in the new material!  I say this to my students all the time.  Ah!!!  Anyways, I like the idea of the couching and how it pulls the pink in just a little, but on the big curve I don't know.  I press on!  I like it all much better than I did, it still just begs to be better!


I wanted to compare the scale of the running stitch filling and the overall change in composition by looking at the "before redo" (on left) and "after redo" (on right).  It seems they are the same size stitches, but they just seem so much bigger on a curve!  I don't mind the size on the lower area of the leaf.  On the upper part though it kind of bothers me--mainly because of how it gets a bit wonky when the radius tightens in the innermost 2 rows.    

Note: The one area is still bare, I think I'm going to repeat the seeding in there, but I wanted to step back and evaluate everything first.  I had also thought maybe repeating the lattice filling to make it heavier?  If I repeated the lattice, I thought maybe filling every other hole with a french knot instead of every hole.  This way it would be not too heavy but maybe anchor that leaf.

Thursday, January 2, 2014

When to Say When . . .

Possibly one of the hardest things for me is figuring out when to call it on a project.

I filled the small bits that I had left with button hole stitch filling in the lightest blue.  I'm not certain that I like it, but I also don't necessarily dislike it.  Part of the problem is I'm not terribly fond of the left leaf in general.  The right left was better planned to be honest.  I knew which techniques at the beginning I wanted on that leaf when I was sketching.  However the leaf on the left has been more flexible as I have been deciding the techniques as I go. The other possibility is that with the leaf on the right I completed it first in Durham when I was on my intensive.  The leaf on the left I have worked at home--leaving room and time for changing my mind and second guessing myself.  

Anyways, maybe I'm done or maybe I might add something else.  I kind of want to do something on top of the running stitch background of the 3 sections of the left leaf, but then do I need to?  I don't know.  Something just feels like it's missing or not finished.  Or maybe I've just been working on it for so long that I cannot objectively call it quits on this one.  Anyways, another bit done!


Monday, December 30, 2013

Just 1 little bit left!!!

Today I got to work on finishing my RSN crewel piece.  I did the lattice work on the left leaf.  I did a fairly small lattice with a gradient securing stitch and gradient french knots in the centers.  Then outlined that section with stem stitch.
 Lattice added. 

 Gradient securing stitch.

 Gradient french knots added.  I did the gradient on the french knots one step lighter than the securing stitch that they were beside. 

 Stem stitch outline.


So close to finishing . . . 

Monday, December 23, 2013

Happy Holidays and Happy Stitching!!!

Progress is being made on my RSN crewelwork piece!  So excited that I just have 2 more bits to go and then I can mount it and have it assessed (though that last bit makes me very nervous)! 


Saturday, October 12, 2013

Another Bit of Crewel

I've missed working on this crewelwork!  I stitched the tendrils using stem stitch and finished the large circular area of the left leaf with stem stitched stems, chain stitched leaves, and a couple French knot buds.  I may go back and redo the buds in the light pink.  I used the lightest blue and I don't mind it for the area, but I feel that the overall composition of the piece may need a wee bit of light pink in there.  I also thought about adding maybe a bit of seeding in the light pink- but I feel that may be too busy.  I'm going to finish the last 2 bits and then see if/what I need to adjust.


Friday, October 11, 2013

Finishing my RSN Crewelwork Module:

Since my crewelwork piece for the RSN Certificate program was closer to being finished, I decided to frame it up and finish it first and then go back to silk shading.  Mentally, I needed one of them off my "to-do" list.  As you can see I have a little bit of "help" stitching now!  

The bit I finished today was the stem stitch outline of the large area of gradient rows of stem stitch on the leaf on the right side and the smaller bit at the top of that same leaf using adjacent rows of stem stitch.


Friday, June 7, 2013

Blanket for Zay is ALMOST done!!!!

So close!  I have run out of the red thread for the blanket stitch, so off to the store tomorrow to buy more to finish it up!  This is the blanket I made for my beautiful little boy, Zay.  

I wanted to do a fun blanket for his room that was my version of something for a child.  All the motifs are backyard motifs--dandelions, beetles, lizards, birds, clovers, owls, dogwood trees, etc.  I bought all my fabric from Alabama Chanin.  It is all organic jersey knit, and I stitch the blanket in an "Alabama Chanin" style.  

The front of the blanket is created with a double layer of the cotton jersey.   The motifs are created with using large backstitched outlines and reverse applique. The back of the blanket is a single layer of jersey with a layer of 1/4" cotton batting (wading) with the leaves quilted with a running stitch and Zay's name and birthday backstitched.  The back wraps to the front and is attached with a blanket stitch edging. 


Wednesday, May 23, 2012

RSN Crewel: Day 8

The words I hate uttering:  "I didn't finish". . . so until I return home and can frame it back up, here is the state of my crewel piece.  I was so close! 


Friday, May 18, 2012

RSN: Crewel Day 7

Here's Everyone working hard finishing up before Friday!  I'll have more to come about Tracy's studio in Fowler's Yard, Durham, UK once I finish my stitching.
 (Clockwise from bottom) Heidi working on her silk shading Clematis, Gill working on her silk shading Orchid, Louise working on canvas work Lily Pads,  Jean working on silk shading Poppy, Zoe working on silk shading Tulip, Pat working on stumpwork Fairy and Toadstools, and Tracy saving my hummingbird!


And me, slowly making progress!