Pages

Friday, May 25, 2012

RSN Silk Shading: The Design

For my silk shading embroidery design, I took photos of the Lily-of-the-Valley in my yard.  I took lots and lots of photos--when they first popped out of the ground and were just buds and once they had fully bloomed.  I finally decided to blend elements from the following 3 images to create my own composition.  


RSN Silk Shading: Day 4


RSN Silk Shading: Day 3

Split-stitching around the bud

Progress at end of Day 3:

RSN Silk Shading: Day 2

Progress at the end of Day 2

Wednesday, May 23, 2012

RSN Silk Shading: Day 1

On Tuesday, I started 2 weeks of silk shading!  Really nervous about this module, but excited too!  For Day 1, I finalized my design, plied my silk onto my calico, transferred my design onto the silk using gouache (after pricking and pouncing), and stab stitched around all the outlines.  Ready to start stitching on Wednesday!


RSN Crewel: Day 8

The words I hate uttering:  "I didn't finish". . . so until I return home and can frame it back up, here is the state of my crewel piece.  I was so close! 


Friday, May 18, 2012

RSN: Crewel Day 7

Here's Everyone working hard finishing up before Friday!  I'll have more to come about Tracy's studio in Fowler's Yard, Durham, UK once I finish my stitching.
 (Clockwise from bottom) Heidi working on her silk shading Clematis, Gill working on her silk shading Orchid, Louise working on canvas work Lily Pads,  Jean working on silk shading Poppy, Zoe working on silk shading Tulip, Pat working on stumpwork Fairy and Toadstools, and Tracy saving my hummingbird!


And me, slowly making progress!


Friday, May 11, 2012

Thursday, May 10, 2012

RSN Crewel: Day 2

Today I stitched more on the trunk and started the right-side leaf.  The middle part will be lattice with a checkerboard of gradient French knots (I have finished lattice bit).  I am also working on the satin stitch leaves for the top and bottom sections of the leaf that will be surrounded by bullion knots.  I picked out one of the little green leaves because the angle of the satin stitch was too horizontal.  I'm still on the fence about how the blending of the green to blue is going . . . we shall see if I'll end up picking out more!  Below is my progress at end of Day 2.  I was trying to take my time so that the lattice would be as straight as possible and am trying to get all my stitches tighter and better crafted.  

Now, back to my stitching!

RSN Crewel: Day 1

Getting ready to stitch:
 After tracing my final design onto heavy tracing paper (vellum weight), I pricked holes following all the lines.  
 
  Below is the finishing pricked design.


Then you align your pricked design on top of your fabric to be embroidered and rub charcoal through the holes.

  Finally, I went back over the charcoal dots with a Prismacolor pencil.


Next:  Looming up
 I stitched the folded edges (top and bottom) to the webbing on my brand new frame,

sewed webbing down the sides,

strung the sides with heavy cotton string through the webbing, and pinned tracing paper over the areas that I was not going to be working for the moment.  Now to the stitching!!!!!!!


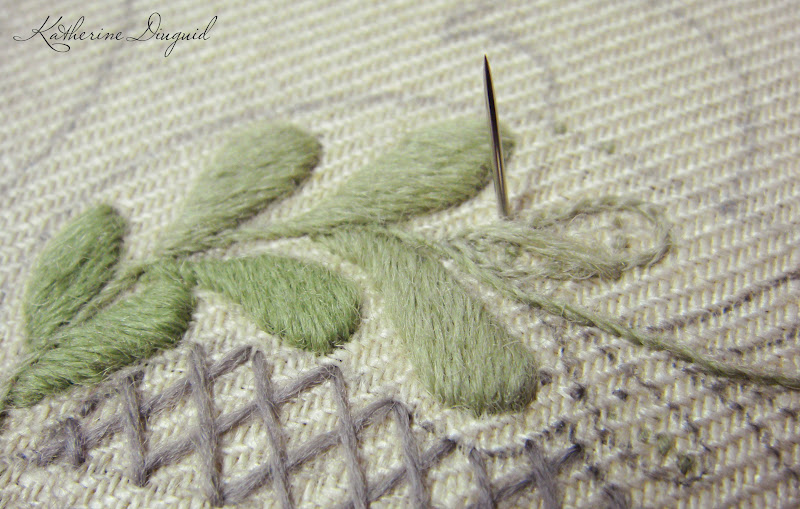
Progress at end of Day 1:
Started the trunk of my Tree of Life using a combination of stem stitch and French knot rows stitched tightly beside each other in 4 different shades of grey.